It's Friday! Which means (sadly) that my week of Cricut basics is coming to an end. This has kind of just been the start of what I'm hoping to make a regular series because I gotta tell ya, as a Cricut newbie I very often found myself confused, frustrated and full of questions. If I can help someone feeling the same, it would make me so happy.
Let me start by saying, YouTube is your best friend. Almost everything I've learned about Cricut, I've learned from YouTube (and trial and error). The Cricut YouTube in particular is great. They have quick and simple tutorials for just about everything! I'm going to share some of my favorites.
Home Page Overview
Inserting Images
How To: Vinyl
How To: Iron on
How To: Cutting More than One Image
Say you're working on a design, for a party lets say... and you're happy with your design and ready to cut, but you need 40 of them. Rather than creating 40 in Design Space, from the "Make It" screen, you can choose how many you'd like to be cut, as you can see here.
Cricut Glossary
There are several words that get thrown around in the Cricut universe that if you don't know what they mean, you could be lost, so I created this glossary for you!
Mirror- For Iron on projects, you are going to want to mirror (or flip) your image or text so that when you go to iron it on, it is is the right direction and you do so from the "Make It" screen.
Print then Cut- Originally when Print then Cut was introduced, people were very confused because they didn't understand how their Cricut machine was going to print and that's because, it actually wasn't going to. Print then Cut is a feature that partners your home printer and your Cricut machine as the best duo since cherry and Coke flavored Slurpees. If you plan to do Print then Cut, I definitely recommend upgrading your printer if you don't have one you love. Thanks to my boss babe Jen, I have this one and love it.
Transfer Tape- If you plan to do any vinyl projects, Transfer Tape is a must. As it says in the name, it helps you transfer your project from the backing to your project surface easily. Otherwise you would be attempting to place each piece individually by hand which i definitely do NOT recommend.
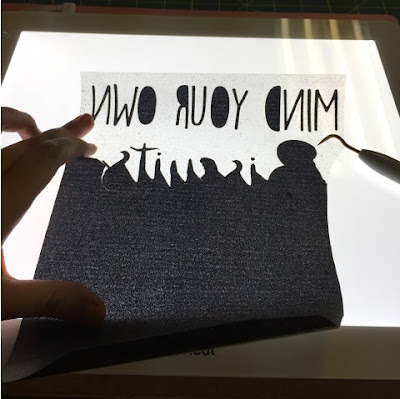
Weed- Weeding is removing the negative space from your project, which you can see me doing here:
You will weed with all vinyl and iron on and projects. The new BrightPad makes weeding way easier.
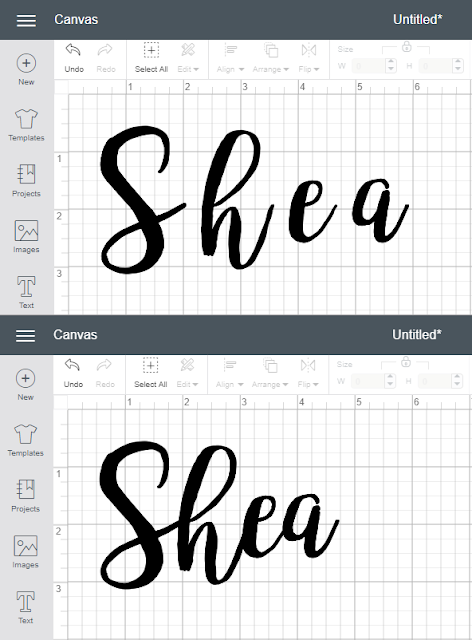
Weld- When you hear the word weld, I'm sure you picture sparks flying and a huge welders mask. While this isn't exactly like that, it is actually very similar. It is how you tell your machine to bond two (or more) items together so that they cut as one. Here is an example...
As you can see... originally, each letter was going to cut separately, but I moved them all so that they were touching and then welded them to be cut as one.
And that concludes my Back to School Cricut Basics week! I hope that you were able to find something useful within it. If you still have any question, please feel free to ask! I'd love to answer them! I'd also love to see your Cricut creations so be sure to tag me in them!


No comments:
Post a Comment